Teaching in Room 9
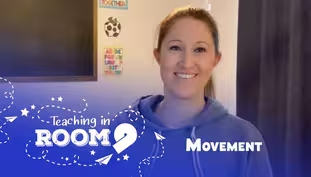
Strengthen Your Abdominal Muscles | Movement
Special | 28m 49sVideo has Closed Captions
Students will learn and practice various exercises to strengthen their abdominal muscles.
In this lesson, students will learn and practice various exercises to strengthen their abdominal muscles. / Julia St. Louis, Mehlville School District, Rogers Elementary School
Problems playing video? | Closed Captioning Feedback
Problems playing video? | Closed Captioning Feedback
Teaching in Room 9 is a local public television program presented by Nine PBS
Teaching in Room 9
Strengthen Your Abdominal Muscles | Movement
Special | 28m 49sVideo has Closed Captions
In this lesson, students will learn and practice various exercises to strengthen their abdominal muscles. / Julia St. Louis, Mehlville School District, Rogers Elementary School
Problems playing video? | Closed Captioning Feedback
How to Watch Teaching in Room 9
Teaching in Room 9 is available to stream on pbs.org and the free PBS App, available on iPhone, Apple TV, Android TV, Android smartphones, Amazon Fire TV, Amazon Fire Tablet, Roku, Samsung Smart TV, and Vizio.
More from This Collection
A collection of Arts lessons from Teaching In Room 9.

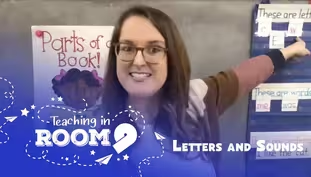
Phonemic Awareness - Consonant Digraphs | Letters and Sounds
Video has Closed Captions
Anchor chart, whole brain teaching, and songs in order to practice consonant digraphs. (29m 54s)

Rainforest Animal Movement | Movement
Video has Closed Captions
Campers will get their bodies moving by acting like animals who live in the rainforest. (27m 3s)

Phonemic Awareness-Changing Sounds in Words|Letters & Sounds
Video has Closed Captions
Julia starts by reviewing what we have previously learned by singing review vowel songs. (29m 50s)

Phonemic Awareness - Vowel Sounds | Letters and Sounds
Video has Closed Captions
Using an anchor chart and songs to distinguish between long and short vowel words. (29m 26s)

Phonemic Awareness- Segmenting Sounds | Letters and Sounds
Video has Closed Captions
In this lesson Julia uses an anchor chart & songs to discuss segmenting sounds in words. (29m 46s)

Movement Mission to Space | Movement
Video has Closed Captions
Campers will get their body moving by doing various exercises to complete a space mission. (27m 56s)

Phonemic Awareness - Rhyming Words | Letters and Sounds
Video has Closed Captions
In this lesson, Julia uses an anchor chart and songs to discuss rhyming words. (29m 19s)

Decoding Using Spelling Patterns 2 | Letters and Sounds
Video has Closed Captions
In this lesson, Julia reviews previously learned skills. (29m 15s)

Decoding Using Spelling Patterns 1 | Letters and Sounds
Video has Closed Captions
In this lesson, Julia reviews previously learned skills. (29m 30s)
Decoding Using Syllables 2 | Letters and Sounds
Video has Closed Captions
Using anchor charts and songs to practice using syllable rules to decode new words (29m 44s)

Decoding Using Syllables 1 | Letters and Sounds
Video has Closed Captions
Julia uses anchor charts and a song to practice using syllable rules to decode new words. (29m 35s)
Track and Field Movement | Movement
Video has Closed Captions
Students will learn a variety of different track & field events they can practice at home. (28m 54s)
Providing Support for PBS.org
Learn Moreabout PBS online sponsorship(upbeat music) - Hi everyone, and welcome back to "Room Nine", our region's largest classroom.
My name is this Mrs. St. Louis and I'm a teacher at Rogers Elementary School in the Mehlville School District.
And we are located in South St. Louis County.
Today, I'm here to teach a movement lesson that's geared towards children of all ages.
So, all you'll need today to participate is a bottle of water to keep yourself hydrated.
You might want a mat or some type of towel for the floor but that's not necessary.
And, you.
So, I hope that you're ready to get your body moving.
Let's get started.
We're gonna begin by warming up our body so that it's ready for today's activities.
So, let's start by just crossing our arms in front, warming our arms up, moving our shoulders, beginning to get that blood flowing through our body.
And let's do some tiny arm circles forwards and make them bigger.
And tinier arm circles backwards and make those bigger.
Excellent!
Now we're gonna stand in a straddle.
So we're going to have our legs, with our feet, just a little bit further than shoulder-width apart.
So my shoulders are here, so I want my feet to be outside of my shoulders, right?
The farther out you go, right, the more it's going to be a little, well, the easier it will be to touch the floor which is what we're going to be doing.
So reach to one side, go ahead and try and touch your toes or go down as far as you can and if all you can do is get to your knee, stop at your knee.
Each time we continue to practice this you'll see that you get better and better, more and more flexible.
And switch.
Can you reach to the other side, drop all the ways far down as you can, feeling that stretch in the backs of our legs.
And now we're going to reach to the middle.
So you wanna get as far down as you can, right, if you can touch the floor, but if you can't, just go as far as your body will let you.
Again, the farther out your feet are, the easier it will be to touch the floor.
And come on up.
All right, whew!
That was good.
All right, let's see if we can get our blood pumping.
Remove my mat out of the way, I don't wanna slip and fall.
And I know that with my mats on my hard floor, sometimes it can get a little slippery.
So be careful of that.
We're gonna begin by warming up.
So, let's start with raising our knees up in front of us just in a slow pace, beginning to get that movement ready.
Sometimes I put my hands out, just to make sure I'm getting my knees high enough.
All right, for 20 seconds we're gonna pick up our heart rates as we run, getting our knees up.
Are you ready?
And go!
One, two, three, four, five, six, seven, eight nine, 10, 11, 12, 13, 14, 15, 16, 17, 18, 19, 20, whew!
All right, slowing it back down.
This time we're going to make our feet behind us, trying to get our feet to kick our bottoms behind us.
Slowing it down, bringing the heart rate down.
Don't forget to breathe.
(feet pattering) Stretching those legs out.
And again, we're gonna go 20 seconds where we speed it up.
All right, are you ready?
Sprint speed up, bringing our legs to our bottoms, go!
One, two, three, four, five, six, seven, eight, nine, 10, 11, 12, 13, 14, 15, 16, 17, 18, 19, 20.
Whew!
Pick that heart rate up real good, haven't we?
All right, let's talk about our lesson focus for today, whew!
Today, we're gonna slow things down and we're gonna be focusing on our balance today.
Doing some different exercises to really focus on our body's position as we do some different balancing activities and stretches.
So, the thing to think about today as we're doing this, number one, go slow, right?
The faster we do things the more likely our body is to get off balance.
Do it slow.
And today we're also going to be going through some modified positions, getting a little bit more challenging as we do each piece.
So if you need to, go back down a step and do what you can.
Don't push your body more.
Balance is something that takes a lot of practice, right?
So today we're just gonna be learning some of the basic poses that we can do and the basic stretches to help improve our balance and over time, we're gonna notice that our balance gets so much better.
So, are you ready?
All right, let's begin.
We're gonna begin by just standing still, arms by your side.
I want you to close your eyes for a minute and as you're breathing, why don't you just think about where your body position is.
When it comes to balance, knowing where your body is, is really important.
And you'll begin to notice that as you're standing still, you're not really standing still, your body sways back and forth, side to side a little bit.
Even the more I talk about it, the more I begin to move.
So, we're noticing that our body's always trying to find a balanced position.
It's always looking to be balanced, right?
That way, we can stand up straight and tall.
If, as we're standing here, you maybe start to lean backwards, you'll notice you get off balance, right?
And that's when you have to stand up straight or fix your body, okay?
That's something to pay attention to as we're doing our movements today.
One thing I noticed and I like to think about, is the center of my body, right?
Down through the center and you can feel it along your back, you have your spine, right?
And so if I begin to lean, my spine can get a little bit crooked, a little bit off and that's when I have to move the rest of my body to help and maybe, that means that I have to step a foot to get my balance back, maybe that means that I have to push my hips one way or move a leg the other way, I have to do something to help keep myself balanced or I'm gonna fall.
So think about that today, all right?
First things first, we're going to begin, all right, with just a simple balance pose.
We're going to bring one foot next to our ankles.
So I'm just gonna bring it just a little bit up off the floor.
So my foot is resting against my ankle and it might help if you bring your hands right in front of you.
Whew!
You can see I'm even starting to feel a little bit off balance myself.
If you feel off balance, put your foot down and try and come back up.
So again, let's see if we can hold it for five seconds.
Are you ready?
Whew!
I don't even know if I can.
One, two, three, four, five.
Very good!
All right, switch sides.
Let's see if we can do the other side.
Sometimes you have one side that's a little bit better than the other.
Again, taking that foot, bringing it right to your ankle.
Ooh, I think this might be my better side!
Thinking about where my body is, right?
The more I lean one way, the more and more likely I am to fall.
So you really have to think about where my body is.
Let's see if we can count to five.
One, two, three, four, five.
Very good!
All right, let's take that pose up a little bit higher.
Now, you're going to bring your foot and try and bring it against your knee.
So I'm gonna bring my foot up higher.
You might need your hand to help you get it there.
And again, you can put your hands out, you can bring your hands to the center, whichever you find is easiest for you.
Again, if you fall over, totally fine.
These are brand new poses, something brand new for us.
Think about your body, go slow and see if you can hold it for one, (groans) two, three, four, five and come down.
Same thing as last time, we're gonna try on the other side again, bringing that foot to our knee, trying to see if we can hold our balance.
Last week, we worked a lot on that core, really squeezing our stomach tight.
We have to do that again today, right?
If I am slouching over, it's gonna be a lot harder to keep my balance.
So I need my posture to be up nice and tall, shoulders back, squeezing both my belly and also squeezing my bottom.
Really thinking about where my body is, so that I can stay balanced.
So I'm gonna bring my foot up, ooh!
It can also help if you're near a wall, to help stabilize you till you're ready to let go.
And again, try and find that balance position, whatever works best for you.
Sometimes I know maybe putting your hands on your hips might help.
And let's see if we can count to five.
One, two, three, four and five.
Very good!
Bring it down!
Excellent job working on that balance pose.
All right, again, same thing.
We're going to do some balancing but this time, we're going to be bringing our leg up behind us.
We're gonna start really small.
So in this one, I'm gonna keep my body straight, keeping my posture straight up and I'm just going to bring one foot up behind me.
Focusing on where my balance is, I might have to lean forward a little bit, but again, I don't wanna bring my foot up too far, just a little bit off the ground.
So let's see if we can hold this one for five.
One, two, three, four, five and let's switch.
(groans) Feeling my legs.
(groans) That one's a good one.
All right, same thing, just with the other leg again.
Trying to see if you can lift it, just a little bit off the ground.
Holding your body still, balancing nicely, for one, (groans) two, three, four, five.
Very good, come on down.
All right!
Again, let's kick things up a notch, a little bit higher.
This time we're gonna try and raise our leg up higher and to do this, we're going to need to bring our chest forward.
We're almost gonna ended up with our body looking like it's an a T-position.
So I'm gonna have one foot flat on the floor, reaching my arms forward, bringing my back leg up and I'm gonna need to hold my body just like it's in a T. Again, this one might be a little bit more challenging for you.
You might need to be near a wall, so you have a hint to balance, right?
Take it slow.
If you can't get all the way to a T, have your T look a little crooked.
Go as far as you can.
Again, balance is something that's going to take practice and time.
Are you ready?
Let's see if we can get to a T to hold for five.
I'm reaching forward, bringing that leg up, holding for one, two, three, four, five.
Come on down, ooh!
That was an unbalanced coming down.
All right, good.
We're gonna switch sides.
So, different foot in front, that other foot's going to come behind.
Again, reaching forward so that I can try and balance.
Are you ready?
Let's go.
(groans) One, two, three, four, five.
Come on down.
(groans) I don't think that leg was as steady.
And it's important that we practice things on both sides.
You'll wanna be able to keep balance on both sides, keeping with both things.
(groans) That was tough.
How do you feel?
Feel balanced?
All right.
Let's do some balancing on the floor.
So, what we're going to do here, is we're going to get down into a downward position.
So I'm gonna have my feet just a little bit apart, right?
I want them to be about shoulder-width apart, I'm gonna bring my hands down in front, almost making like a mountain shape of my body.
So, my butt's gonna be up in the air a little bit.
And for this one, we're just going to practice lifting one foot up to keep our balance.
So let me show you.
I have my feet on the floor, I'm going to crawl my hands out, just a little bit, so I almost create this mountain with my body, right?
Almost like I'm creating a triangle while I come to the floor, where my bottom is going to be at the top.
Then what I'm going to do, is I'm very slowly and carefully going to lift one leg up, so that way, I can see if I can hold that balance position.
So I'm going to be back up in my pose, lifting one leg up, see if I can hold it for one, two, three, four, five.
Come on down.
Whew!
Bring your knees down.
(sighs) Take a deep breath.
Don't forget, when you're doing these poses, don't forget to breathe.
Sometimes that's really hard for me, I'm so focused on trying to stay still, I end up forgetting to breathe.
Make sure you breathe, that's important.
All right, hands back down, back up in our pose and we're gonna try and lift the other leg up for one, two, three, four, five.
Very good!.
Whew!
All right.
That was phase one.
Are you ready to kick it up a notch?
This time, when you lift a leg up, you're going to lift up the opposite arm.
So now you're balancing on one leg and one foot.
(groans) On one leg and one arm.
So again, we're going to be doing opposite, okay?
So this time I'm going to be lifting up my left leg, the one that's in front and my arm that's at back, okay?
So I'm gonna go up in my pose, I'm gonna start by lifting my leg, then I'm gonna lift my arm and see if I can go, (screams) one, two, three, four, five.
Whew!
That is definitely a tricky one.
So again, if it's too hard, work your way up.
If you can't lift your arm up yet, that's totally okay.
We're working towards that goal.
Remember, we can practice these poses for just five seconds every day and we're gonna start feeling, start to see, a significant increase in our abilities the more we practice.
So, this time, other leg goes up, other arm goes up, are you ready?
Time to push up to my position.
Lift my leg up, lift my arm up and see if I can count to one, (screams) two, three, four, five.
Come on down.
Whew!
Balancing is definitely tough work.
Know what, sometimes when we think more about working out, physical activity, we think about things that are quick and fast, but sometimes, even the slow stuff can be really, really hard.
So, let's take a minute.
Whew!
Let's get a drink of water, rehydrate and then we're ready to do some more balancing.
All right, so now that we have hydrated our body, gotten a little break, let's get back to some more balancing.
We're gonna bring it down to the floor now.
And we're going to do what we call a V-sit pose.
So this is something that's gonna use a lot of those abdominal muscles, the stomach muscles that we practiced last week.
So what we're going to be doing is we're gonna lean back a little, and our goal is to make our body look like a V. So, we're going to be lifting our legs, straight up in front of us, okay?
And holding our back up off the ground, to create a V. Now, this is definitely something that's challenging and gonna require a lot of, (groans) definitely some of those ab work to keep that balance.
So, some ways that you can make it easier, don't put your life straight up, keep your legs bent, it's gonna make it easier.
Also if you need to, gently hold behind your legs.
That's gonna be a good way to practice that balance.
So, let's try that first.
Leaning back a little bit to get my V from my back coming and I'm gonna hold my legs, just that keeping my hands behind my legs, just gently holding them up to begin to get that balance.
Then, if I want, I can let go.
Keeping that balance, thinking about that stomach.
Whew!
Come down for a second.
Whew!
It's definitely hard to hold for a really long time.
Whew!
Feeling that one.
All right.
But, I think we're ready to kick it up a notch.
Are you ready?
Going back, bringing my lose legs up, hands behind my legs and I'm going to bring my feet straight up, oh!
So you see how, as you begin to arch your back, you're gonna start to fall backwards.
We really have to make sure that we're keeping that back straight, almost making sure that we push our chest out bring it back.
We don't wanna begin to get that arch cause that's when we're gonna fall over.
So, straight legs out in front and see if you can let go and hold it for one, two, three, four, five.
Whew!
Come down.
That is a tough balancing act, I'm not going to lie to you.
That one is very, very difficult, but it's one that I know that as we continue to practice, we're going to get better at.
Here's our next one.
Our next one is going to be a shoulder stand.
So for this one, trying to think what's the easiest way for you to see it.
(chuckles) Let's go this way.
For this one, I'm gonna be balancing on my shoulder.
So I want to be laying back down and the goal is to get my feet up in the air.
And so I'm gonna be balancing on my shoulders behind me.
So, easiest way to begin this one, it's just laying on my back and lifting my feet up in the air.
(exhales) Think about where your feet are so they're not falling to the side, right?
We want them to be straight above our hips.
Now, here's where the hard part comes into play.
I'm ready to be leaving my hands down by my side to help with that balance and I'm going to have to rock a little bit using my ab muscles and my goal is to get my feet to go straight up in the air and my back, not to be touching the ground.
So I am balancing on my shoulders.
So, it almost takes a little bit of a push to get yourself up there.
So I'm going to push, whew!
Might have to use your hands to help you.
So if I bring my hands back behind my back, I can hope to hold myself up and hold it for one, two, three, four, five.
Come down.
So, definitely using your hands to help you as you hold your back up, is going to be good, but if we want to kick it up a notch, I can let go of my hands.
So we're gonna get ourselves back up to that position and then we're going to try letting go.
So, I'm going to push myself up and then I'm going to see if I can let go and hold for one, two, three, (groans) four, five.
Whew!
(laughs) Didn't quite make it that full five seconds but again, practice is what's going to help us get better.
If you can't make it the full five seconds, it's totally okay.
We are just starting out and learning these positions, so, we can get better.
Now, onto the tough skills of today, the first one is going to be a tripod.
This is what a beginning stand to a headstand looks like.
Really balancing on your head and your arms.
So in a headstand, our head touches the ground.
So we're going to be using our head and our hands to create a triangle.
So my head's on the ground and my hands are going to be below my head to create a triangle.
For example, I'm going to have my head on the ground and my hands down on the floor, creating a triangle.
Now, my goal is going to be to get my knees on my elbows, okay?
Know it's tricky, but I say it sometimes, you just have to watch.
So I'm slowly going to bring one knee to one elbow, one knee to the other to balance.
Again, work your way up to it.
If this is too hard, it's okay, take a break.
This is definitely going to be one of the most challenging poses that we have today.
Requires lots of total body balance.
So I'm gonna put my head down, put my hands down, gonna try and bring my knees up to my elbow.
So, I'm gonna bring my feet up, put my knees on my elbows to see if I can balance I'm ahead of my hands.
And come down.
Whew!
That's a tough one.
Don't try and hold it for too long while the blood rushes to your head.
Takes a lot of balance.
Definitely takes a lot, but I know that you can do it.
Now, we can kick that one up a notch though because I know that as we continue to practice and we gain mastery in this skill we wanna be able to know how to bring it up.
So, what comes after the tripod, the headstand.
So from that tripod position, where I have my knees balancing on my elbows, I'm going to lift my feet up in the air and try and get up to a headstand.
Now, here's something to note.
If you are in an area where you do not have a mat around you be aware that as you fall, you might fall and hurt yourself.
If there are tables and chairs around you and you fall over onto them, that might be something that could be in the way.
So think about being in a very open area where there are no people around you and no pets around you that you could fall over, no objects to fall and hurt yourself.
You definitely wanna have lots of space around you, okay?
Think about that.
If you don't have that kind of space now, keep this idea in your head and maybe you'll try it when you have some more space, okay?
This is definitely we're having a mat underneath you, can come really in handy cause if I fell on this floor, it's not gonna be super fun.
Now, another thing to think about when you fall, always try and fall with your feet down instead of falling over, that's something where you're gonna roll on to your back.
So my goal is to fall this way if I have fall and probably, when I fall.
So I'm gonna put my head down, free my feet with my knees on top of my elbows and try, (groans) it's hard, whew!
Let's see if we can give it one more try.
This is definitely something I haven't done in awhile.
Again, see if I can lift my feet up (screams) and come back down.
As I said, that is definitely the hardest pose that we have for today and something that takes a lot of balance.
Definitely a goal that we can have as we work our way up to it.
(sighs) Probably one of the ultimate showcases of balance.
I even find that headstands are harder than handstands.
Handstands, you get all the energy from your legs as you kick up to help you get up there.
With a headstand, it requires a bit more balance sometimes.
So boys and girls, the purpose of today was to slow things down to really focus on how our body was feeling.
As we were working on those balancing positions.
I challenge you, practice one or two a day.
The more you practice with your balance, the better it's gonna get.
If you're not practicing your balance, it's something that you're gonna really have to work for.
And one day you're gonna realize, whew!
I am not the greatest balance and it's something you're gonna have to work for for a really long time.
So use it or you'll lose it.
Now, as we bring yourselves down, let's do some deep breathing.
I'm just gonna sit here, I'm just gonna take deep breath in (inhales) and out, (exhales) in (inhales) and out.
(exhales) I'm gonna bring my head behind or bring my chin up.
(inhales) I'm gonna bring my chin back down as I continue to breathe.
(breathes) Bring my ear to my shoulders, stretching out my neck, switching sides.
I'm gonna bring one arm across my chest and just hold at my elbow.
Gently holding it towards myself so I feel a little stretch and switch, bringing the other arm across my chest, holding behind my elbow, gently holding towards myself.
(sighs) I feel that one.
I'm gonna put one hand on the floor beside me, bring my other arm up and over, just leaning over, feeling a good stretch in my side and switch, putting my other arm down and reaching over, feeling that really good stretch.
(exhales) I can bring my feet out and straight out in front of me and I'm just going to reach forward (breathes) taking deep breaths as I go.
(exhales) Feeling that stretch, whew!
Nice little slow down there.
So boys and girls, please remember, balancing is something that I know it can get frustrating.
Don't spend hours and hours trying to practice some of these skills, spend a few minutes every day and I promise you that the more you'll practice, the better you will get and the easier it will get.
So remember, the goal each and every single day is to get at least 30 minutes of physical activity in.
If you can get 60, that's excellent.
That's one full hour of physical activity.
Remember, physical activity can be anything from dancing to your favorite songs, to riding your bike outside, to practicing some of your favorite balancing exercises.
But remember, get moving, get up, get active and we'll see you again next week here in "Room Nine" as we do another movement activity.
Bye everyone.
Thanks for coming.
(upbeat music) - [Announcer] Teaching in "Room Nine" is made possible with support of Bank of America, Dana Brown Charitable Trust, Emerson and viewers like you.
(upbeat music)


Support for PBS provided by:
Teaching in Room 9 is a local public television program presented by Nine PBS